8*4 enclosure lighting

Alex and the Redfoot

Well-Known Member
Joined
Aug 21, 2023
Messages
2,523
Location (City and/or State)
Cyprus
Tahabl

That's useful information. Thank you!

We looked at chicken brooder heat panels during our latest TSC-Sutherlands-Atwoods circuit. The models I saw were broadly similar to reptile RHP, but made-in-China and significantly less expensive. Ultimately, we settled on RHP... but the choice was not easy to make.

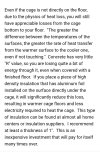
While the basking lamp may turn out to be unnecessary, I bought a single Arcadia reflector and 75w bulbs to experiment with. We're concerned about heat loss through floor/walls after conversation with Bob of Pro Heat.
PVC enclosures should hold heat quite well (yet, markw84 mentioned that he uses double walls and double-glazed doors in his Smart Enclosures).

With my enclosure (not so cool DIY polypropylene closet) most of the heat loss was through the glass front doors and top. I've ended with adding polystyrene insulation panels from the outside. Didn't consider insulating floor, though - substrate layer is holding warmth good enough.

And instead of reptile RHPs I have "infrared knee warmer panel heaters". They do their job but the choice was driven by specific panel dimensions above anything else.
 

incognet

Member
Joined
Jun 5, 2024
Messages
65
Location (City and/or State)
Arkansas
PVC enclosures should hold heat quite well (yet, markw84 mentioned that he uses double walls and double-glazed doors in his Smart Enclosures).

With my enclosure (not so cool DIY polypropylene closet) most of the heat loss was through the glass front doors and top. I've ended with adding polystyrene insulation panels from the outside. Didn't consider insulating floor, though - substrate layer is holding warmth good enough.

And instead of reptile RHPs I have "infrared knee warmer panel heaters". They do their job but the choice was driven by specific panel dimensions above anything else.
I just noticed the typo in my quoted comment. Too bad the window to edit has already passed! 🤦‍♂️

We're looking into different insulation options. Since the enclosure is mounted on wheeled dollies, direct application to underside may be tricky. I think we can stuff material into the gap between dollies and tile, however.
 

incognet

Member
Joined
Jun 5, 2024
Messages
65
Location (City and/or State)
Arkansas
UPDATE: We've settled on a general layout for this enclosure. Reptile Basics will supply the majority of new hardware, including lights and Solarmeter.

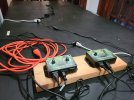
Spyder robotics will supply the thermostats; Dion was kind enough to sell me a (discontinued) Herpstat EZ1 and EZ2. They're not state-of-the-art, but I appreciate the simplicity and reliability of EZ series. I'll most likely pair the basking lamp 'Stat with Kasa smart plug power strip (to mimic day/night cycle), and leave RHP on 24/7 (to provide correct ambient temperature).

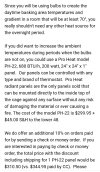
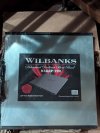
Wilbanks Reptiles will supply the radiant heat panel. A 200w panel costs less than $250, shipping inclusive, and was immediately available. I originally planned to buy from Pro Heat, but their 200w panel costs $300+ and has a 2-week lead time. I'm sure that Pro Heat makes a quality RHP, but we're behind schedule already.
 

Attachments

  • 1000003086.jpg
    1000003086.jpg
    146.1 KB · Views: 7
  • Screenshot_20240622_125858_Outlook.jpg
    Screenshot_20240622_125858_Outlook.jpg
    232.9 KB · Views: 6
  • Screenshot_20240622_125909_Outlook.jpg
    Screenshot_20240622_125909_Outlook.jpg
    273.5 KB · Views: 5
  • image000000(6).jpg
    image000000(6).jpg
    96.2 KB · Views: 5
  • image000001(5).jpg
    image000001(5).jpg
    143.8 KB · Views: 5
Last edited:

Alex and the Redfoot

Well-Known Member
Joined
Aug 21, 2023
Messages
2,523
Location (City and/or State)
Cyprus
I just noticed the typo in my quoted comment. Too bad the window to edit has already passed! 🤦‍♂️

We're looking into different insulation options. Since the enclosure is mounted on wheeled dollies, direct application to underside may be tricky. I think we can stuff material into the gap between dollies and tile, however.
Perhaps, it would be easier to lay insulation on the floor from the inside and cover it with a pond liner.
 

Alex and the Redfoot

Well-Known Member
Joined
Aug 21, 2023
Messages
2,523
Location (City and/or State)
Cyprus
UPDATE: We've settled on a general layout for this enclosure. Reptile Basics will supply the majority of new hardware, including lights and Solarmeter.

Spyder robotics will supply the thermostats; Dion was kind enough to sell me a (discontinued) Herpstat EZ1 and EZ2. They're not state-of-the-art, but I appreciate the simplicity and reliability of EZ series. I'll most likely pair the basking lamp 'Stat with Kasa smart plug power strip (to mimic day/night cycle), and leave RHP on 24/7 (to provide correct ambient temperature).

Wilbanks Reptiles will supply the radiant heat panel. A 200w panel costs less than $250, shipping inclusive, and was immediately available. I originally planned to buy from Pro Heat, but their 200w panel costs $300+ and has a 2-week lead time. I'm sure that Pro Heat makes a quality RHP, but we're behind schedule already.
That's very interesting comment about floor insulation. I think I'll try to do that next winter. I have power consumption measurements from this season to compare.

Once again, thank you for sharing experts designs. I like to learn something new.
 

jaizei

Unknown Member
Moderator
10 Year Member!
Joined
Feb 5, 2011
Messages
9,252
Location (City and/or State)
Earth
It sounds like what was described was meant for enclosures sitting directly on the floor. The air gap created by the wheels will reduce that heat loss significantly. Making a 'skirt' to prevent a constant flow of air underneath more so.

The second screenshot mentions keeping the enclosure in a 70* room, if thats the case, adding additional insulation might help with heating costs some, but i wouldn't view it as necessary. Esp if you have the glass doors at the front. That will be where you lose most heat compared to the pvc walls. If it was in an unheated garage, it'd be a bigger issue.
 

incognet

Member
Joined
Jun 5, 2024
Messages
65
Location (City and/or State)
Arkansas
It sounds like what was described was meant for enclosures sitting directly on the floor. The air gap created by the wheels will reduce that heat loss significantly. Making a 'skirt' to prevent a constant flow of air underneath more so.

The second screenshot mentions keeping the enclosure in a 70* room, if thats the case, adding additional insulation might help with heating costs some, but i wouldn't view it as necessary. Esp if you have the glass doors at the front. That will be where you lose most heat compared to the pvc walls. If it was in an unheated garage, it'd be a bigger issue.
An insulating skirt is a good idea. It may also be more aesthetically pleasing than CVS carts underneath. 🛒

The temperature in our sunroom varies with time-of-day and season, but I have not seen it drop below 68F (even during winter). 75-77F is more typical for daytime. I think you're right... insulation (besides the skirt) would be overkill.
 

incognet

Member
Joined
Jun 5, 2024
Messages
65
Location (City and/or State)
Arkansas
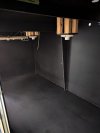
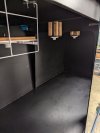
UPDATE: Now that Aldabra enclosure has moved to its final position in our sunroom, the rough-in work may begin. I would rather not drill additional holes; the previous owner left enough behind that we need to utilize and/or plug.

Since light fixtures don't arrive until FRI, we'll begin with installation of radiant heat panel. My tentative plan is a ceiling RHP mount with PVC or treated lumber spacers. These would be attached to the enclosure via 8-9 preexisting holes on LH side. This roughly corresponds with basking zone.

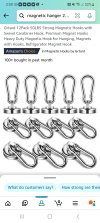
I would like to suspend other fixtures, with possible exception of basking lamp, using magnetic hooks and lightweight chain. We have 25, 50 and 100lb neodymium magnets to experiment with... though I really doubt a 100lb variant will be necessary. The suspension hardware would be non-marring and adjustable. Has anyone else tried this before?
 

Attachments

  • Screenshot_20240627_020051_Amazon Shopping.jpg
    Screenshot_20240627_020051_Amazon Shopping.jpg
    267.7 KB · Views: 2
  • Screenshot_20240627_020026_Amazon Shopping.jpg
    Screenshot_20240627_020026_Amazon Shopping.jpg
    273.9 KB · Views: 2
  • image000000(15).jpg
    image000000(15).jpg
    201.4 KB · Views: 3
  • 20240626_223818.jpg
    20240626_223818.jpg
    1.4 MB · Views: 2
Last edited:

Alex and the Redfoot

Well-Known Member
Joined
Aug 21, 2023
Messages
2,523
Location (City and/or State)
Cyprus
I'm not sure if you need a RHP over basking zone. It's used more for the ambient heating, so placing it in the middle of the enclosure looks more logical.

Using magnets is a cool idea, but I haven't tried it.

And I wonder if swinging can be somehow prevented with long tube/bar fixtures hanged on chains...
 

incognet

Member
Joined
Jun 5, 2024
Messages
65
Location (City and/or State)
Arkansas
I'm not sure if you need a RHP over basking zone. It's used more for the ambient heating, so placing it in the middle of the enclosure looks more logical.

Using magnets is a cool idea, but I haven't tried it.

And I wonder if swinging can be somehow prevented with long tube/bar fixtures hanged on chains...
You're right, of course... placement of RHP in middle of enclosure (top panel) is what most guides suggest for ambient heat. I'd just like to utilize existing holes in ceiling panel which are close to basking zone.

The best compromise solution (imo) was to place RHP in the lefthand third of ceiling panel. It would be adjacent to basking zone, not directly over the incandescent fixture, and still provide ambient heat for the enclosure.

There may be a slight heat gradient effect from mounting RHP near basking zone, but I don't think it will be detrimental to my tortoise (especially if panel is 3' overhead). We can modify plans if I'm mistaken, however.
 

incognet

Member
Joined
Jun 5, 2024
Messages
65
Location (City and/or State)
Arkansas
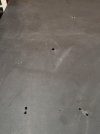
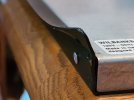
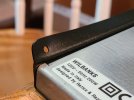
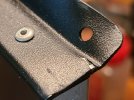
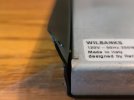
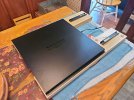
Unfortunately, we've just discovered that RHP was damaged in transit (most likely by UPS). It's a real shame that design isn't modular; there's no way to simply replace mounting hardware. If the metal wasn't split/fatigued, I would use a C-clamp or pliers to straighten the corners.

Wilbanks offered to send a replacement. Hopefully they use better packaging this time.
 

Attachments

  • 20240627_103123.jpg
    20240627_103123.jpg
    1.2 MB · Views: 3
  • 20240627_102338.jpg
    20240627_102338.jpg
    755.2 KB · Views: 3
  • 20240627_102353.jpg
    20240627_102353.jpg
    838.6 KB · Views: 3
  • 20240627_102427.jpg
    20240627_102427.jpg
    1 MB · Views: 2
  • 20240627_111955.jpg
    20240627_111955.jpg
    1.1 MB · Views: 3

incognet

Member
Joined
Jun 5, 2024
Messages
65
Location (City and/or State)
Arkansas
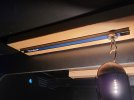
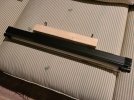
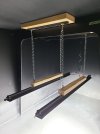
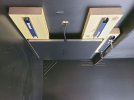
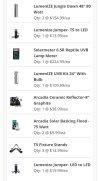
UPDATE: The majority of supplies have been delivered; we just need a radiant heat panel (supposedly arriving FRI) to finish construction. All light fixtures now hang from enclosure ceiling. I had to modify the original design since neodymium magnets couldn't support enough with a thick PVC wall in-between them. The new version has no such interference...
  • Each Arcadia fixture is attached (with stock clips) to untreated 2x3" spruce block
  • Each spruce block has two Q-hanger screw hooks (22lb capacity)
  • The fixtures are suspended from a pair of light-duty chains (90lb capacity), which attach to screw hooks
  • The chains are held aloft by magnetic carabiner hooks (110lb capacity)
  • Each carabiner clip is affixed to a magnetic tool bar (10, 20 or 30lb capacity) directly overhead
  • Each magnetic tool bar is attached (with screws & washers) to untreated 2x6" spruce board on the interior ceiling
Any fixture position is adjustable on both the horizontal axis (via carabiner hook) and the vertical axis (via chain). Small 10w Sansi pucks are available to supplement the 48" LED bars.
 

Attachments

  • 20240702_171051.jpg
    20240702_171051.jpg
    1.1 MB · Views: 3
  • 20240702_171131.jpg
    20240702_171131.jpg
    1,013.4 KB · Views: 3
  • 20240704_011902.jpg
    20240704_011902.jpg
    2.2 MB · Views: 2
  • 20240703_214633.jpg
    20240703_214633.jpg
    1.3 MB · Views: 3
Last edited:

incognet

Member
Joined
Jun 5, 2024
Messages
65
Location (City and/or State)
Arkansas
UPDATE: Our replacement heat panel arrived last Friday. Unfortunately, the packaging was identical to first unit (ie: no Styrofoam or bubble wrap). One corner of RHP frame was slightly warped, but I was able to correct this with a small rubber mallet. This device seems to be functional and very well-made... shipping damage notwithstanding.

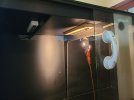
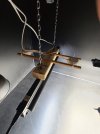
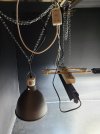
The RHP is now mounted to enclosure ceiling as part of a sub-assembly that includes basking lamp (suspended from magnetic tool bars). An adjacent "chandelier" consists of 24" UVB lamp and 10w SANSI pucks. It's very bright, and less cluttered than you would expect.

We should be mostly finished by tomorrow. I just need to add substrate, plants and probes before the final shakedown.
 

Attachments

  • 20240707_221307.jpg
    20240707_221307.jpg
    1.6 MB · Views: 2
  • 20240707_221201.jpg
    20240707_221201.jpg
    860.7 KB · Views: 2
  • 20240707_220545.jpg
    20240707_220545.jpg
    1 MB · Views: 2
  • 20240706_170510.jpg
    20240706_170510.jpg
    1.2 MB · Views: 2
  • 20240706_155831.jpg
    20240706_155831.jpg
    1.9 MB · Views: 2

incognet

Member
Joined
Jun 5, 2024
Messages
65
Location (City and/or State)
Arkansas
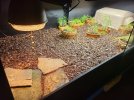
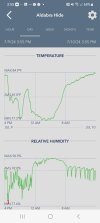
UPDATE: Opening day is nearly here! The enclosure is undergoing a final shakedown before its future occupant arrives (FRI or SAT). All hardware is working as intended, though ambient temperatures are (85F in the hide) if basking lamp runs for 8+ hours. We could address this in several ways...

1) Replace 100w bulb with 75w bulb.
2) Reduce lamp activity to <8h.
3) Install greenhouse fan.

#1 might work, but I'm not convinced that 75w bulb provides adequate heat in basking zone (which is 88-90F with current bulb). #3 will have a desiccating effect that I'd like to avoid. #2 seems like the best option, especially given that torts will bask in the early morning.

According to my new Solarmeter, the UVI of basking zone ranges from 2 (margins of illuminated space) to 6 (directly under UVB "chandelier"), with index of 4 in the warmest spot of flagstone. I could increase this by lowering UVB fixture, but current UVI seems alright to me.
 

Attachments

  • 20240709_225738.jpg
    20240709_225738.jpg
    2.7 MB · Views: 1
  • Screenshot_20240710_155542_SensorPush.jpg
    Screenshot_20240710_155542_SensorPush.jpg
    121.1 KB · Views: 1
  • Screenshot_20240710_155555_SensorPush.jpg
    Screenshot_20240710_155555_SensorPush.jpg
    123 KB · Views: 1

Alex and the Redfoot

Well-Known Member
Joined
Aug 21, 2023
Messages
2,523
Location (City and/or State)
Cyprus
Perhaps, you can remove the protective mesh from the basking lamp dome and use a lower wattage bulb. Reducing lamp runtime is good option as well. LED bars have noticeable heat output too, so you can limit them to 8 hours instead of the basking lamp.

Did you check if radiant panel is kicking in during the day?
 

incognet

Member
Joined
Jun 5, 2024
Messages
65
Location (City and/or State)
Arkansas
Perhaps, you can remove the protective mesh from the basking lamp dome and use a lower wattage bulb. Reducing lamp runtime is good option as well. LED bars have noticeable heat output too, so you can limit them to 8 hours instead of the basking lamp.

Did you check if radiant panel is kicking in during the day?
I couldn't remove the protective mesh (because of how temperature probe is mounted), but I did reduce lamp runtime & intensity somewhat. The basking lamp runs between 6am - noon. The UVB and LED bars have initial 3% brightness (at 5am), building to 100% brightness (at noon), then gradual fade till sunset.

I decided against daytime RHP use since the other fixtures provide more than enough heat. This may change in winter, however.
 

New Posts

Top