Planning new home for a cherryhead

terryo

Well-Known Member
10 Year Member!
Joined
Aug 24, 2007
Messages
8,974
Location (City and/or State)
Staten Island, New York
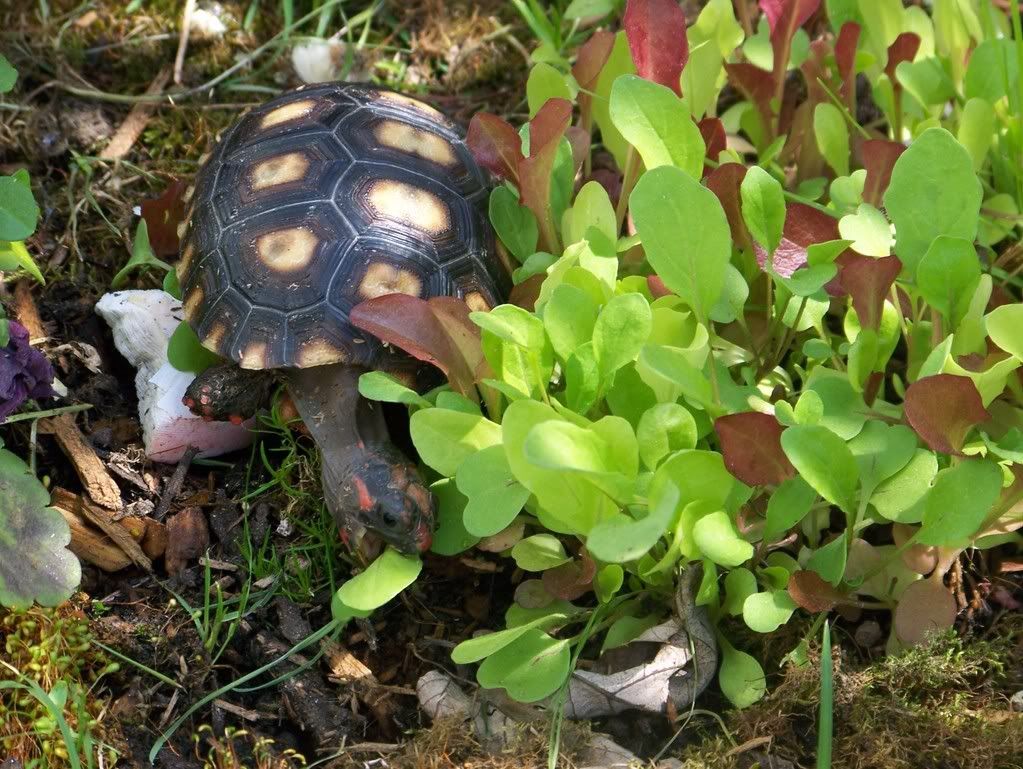
Oh...one more thing I forgot to say. Not written in stone....everyone has their own way of doing things. My way just worked out for me. From the time they were little, I used to wet long fibered moss with very warm water and then squeeze it out and fluff it up and put it in their hides. They literally had to dig their way into the hide and the wet warm moss. I kept the CHE over the warm moist hide. Trial and error.....this worked for me and helped me raise some very smooth healthy Cherries. Again....just my way of doing things.
2efjqsi.jpg
 

Redfoot NERD

Well-Known Member
10 Year Member!
Joined
Dec 5, 2007
Messages
3,662
Location (City and/or State)
Tennessee
anyone who has ever seen the "jungle" @terryo created for her babies early on.. should realize the importance of keeping their shells "humid'! - one of the 4 "etched-in-stone" requirements of maintaining EVERY tortoise on the planet! EACH of the 4 may or may not be different for each tortoise species.
How they are applied and/or kept is up to the individual.. Those that think they can re-invent the wheel of keeping redfoot tortoise may never learn.. or accept.. what works best.

Over ten years ago.. after following the only info I could find - which raised stunted and bumpy 1-2 year old redfoots - I did basically the opposite of what I had been doing.. and the results created redfoots like Terryo and others have now! So this is not about "The Turtletary Caresheet" ( although I've been accused of boasting ).. this is about what works best for our beloved redfoots.

Temperature,, Lighting.. Humidity and Diet are the only 4 things that need to be balanced .. and "HOW" those are balanced are NOT "etched-in-stone". However ... they DO need to be. Don't get me wrong.. it does this OLD heart good to hear that the caresheet established creates beautiful redfoots- can't tell you how many it has for me.

Can I get a witness?
 

a5fung

Member
5 Year Member
Joined
Aug 7, 2010
Messages
73
Hey @Redfoot NERD, I've read you caresheet and some of the things I've gathered was based on it :). Speaking of moss @terryo mentioned, I'm using sphagnum moss under and around the hide areas.

Right now I'm able to get humidity between 88-90%. I'm working to get the temp up higher, I can achieve low 80s in the opposite end from the CHE, i think if i cover the openings on the top I should be able to bump it up by a couple degrees. I'll be using reflectix that @Pearly suggested.

Thanks all!
 

Redfoot NERD

Well-Known Member
10 Year Member!
Joined
Dec 5, 2007
Messages
3,662
Location (City and/or State)
Tennessee
The mid-80's need to be where they stay the most - in their hide... just like Terryo described. The 'long-fibered' sphagnum. moss needs to be IN the hide.. especially as 'wide-open' as your enclosure is.

From the caresheet.. ( sounds like Terryo copied it doesn't it? ) .. it sure worked for her.-

A flower pot cut in half or a log "tunnel" pointed 'away' from the light source-
( you don't sleep with the light on.. do you? ) is ideal for hatchlings.
Moistened "spag moss".. which has been pulled apart to become "fluffy"..
is placed inside the pot.
A "heat-emitter" directly over the "hide" will keep the temps up..
and a daily misting of the moss will help keep the humidity up inside.. also.
Only mist the moss enough to keep it moist.. not so much as to saturate!


What you are doing is creating an environment "by theory" .. you won't know how it works until you get your first redfoot in it.!!!

I remember my first hatchling ( of over 200 ).. I don't think I slept for several nights after that. All things said and done is meaningless until we can see how your first redfoot RESPONDS to all your work and research. Then we can make adjustments as needed..... which I doubt will be many!

Ask Terryo to see her "jungle". She has 10 'green-thumbs".. haha...
 

Pearly

Well-Known Member
5 Year Member
Joined
Jul 14, 2015
Messages
5,279
Location (City and/or State)
Central Texas, Austin area
anyone who has ever seen the "jungle" @terryo created for her babies early on.. should realize the importance of keeping their shells "humid'! - one of the 4 "etched-in-stone" requirements of maintaining EVERY tortoise on the planet! EACH of the 4 may or may not be different for each tortoise species.
How they are applied and/or kept is up to the individual.. Those that think they can re-invent the wheel of keeping redfoot tortoise may never learn.. or accept.. what works best.

Over ten years ago.. after following the only info I could find - which raised stunted and bumpy 1-2 year old redfoots - I did basically the opposite of what I had been doing.. and the results created redfoots like Terryo and others have now! So this is not about "The Turtletary Caresheet" ( although I've been accused of boasting ).. this is about what works best for our beloved redfoots.

Temperature,, Lighting.. Humidity and Diet are the only 4 things that need to be balanced .. and "HOW" those are balanced are NOT "etched-in-stone". However ... they DO need to be. Don't get me wrong.. it does this OLD heart good to hear that the caresheet established creates beautiful redfoots- can't tell you how many it has for me.

Can I get a witness?
Yep! Yours truly! I keep telling new RF owners how between Turtletary and Tortoise Library I was able find most of my recipe for a healthy RF baby:)
 

a5fung

Member
5 Year Member
Joined
Aug 7, 2010
Messages
73
Made some adjustments based on the feedback. I moved the strip light to one side and the hide to the other side, under the CHE and facing away from the light. I now have two hides under the CHE. The side with the light is pretty bare now, I plan to put more plants there. A little garden for the torts and also, it'll block out more of the light from spreading to the darker side. As you all suggested, I'll have to see how the tort behaves before I'll know what other changes I'll need.

Thanks for all the help!

IMG_20160912_215148.jpg IMG_20160912_215206.jpg
 

Redfoot NERD

Well-Known Member
10 Year Member!
Joined
Dec 5, 2007
Messages
3,662
Location (City and/or State)
Tennessee
We're proud of the fact that you are doing all of this BEFORE you have your redfoots - most have to make their changes AFTER they get their critters.. which only stresses them [ both ] out! haha

You have all of the necessities - now to get them arranged "in order"!

Think of it this way - one side is where they eat and drink/bathe. the other side is where they sleep.. where it's warm and really humid.. AND DARK!

Now since we have to contend with the hole in the ceiling.. that is the end that their 'warm and 'humid' hide will be in. Based on size/floor space.. you only need one 'hide'.. and it should be in the back left so there is only one way in and out! Now place the heat emitter as close to directly over it as you can That is all that will be on the left side.

The light needs to face the end that it is in.. turn it 180 degrees - facing the end wall. [ you may want to pull it back away from the end wall some.This end is where they will eat and drink/bathe - so the light will be directly over them. Now place their slate in one corner and the water dish next to it

Need to mention at this point.. Terryo had more light because she literally created a JUNGLE of plants.. which acted as a "canopy" to filter out most all of the light below! Her enclosure was much taller than yours also.. which allowed for more overhead space.

Not sure what the purpose of the stones are.. they could create a "stumble" for babies. [ which have a tendency of turning over ] Of course you can arrange the plants around the light as you like. My only opinion - give them as much flloor-space as you can.. the less stuff hatchlings have to deal with.. the better.

What I've described is the basic set-up arrangement.. that has worked since 2005 for untold numbers of redfoot keepers. During those 10+ years around 200 hatchlings - at various stages of growth - have been introduced to this arrangement. What's the old saying? ... "When it works don't fix it"!!!
 

Pearly

Well-Known Member
5 Year Member
Joined
Jul 14, 2015
Messages
5,279
Location (City and/or State)
Central Texas, Austin area
Oh...one more thing I forgot to say. Not written in stone....everyone has their own way of doing things. My way just worked out for me. From the time they were little, I used to wet long fibered moss with very warm water and then squeeze it out and fluff it up and put it in their hides. They literally had to dig their way into the hide and the wet warm moss. I kept the CHE over the warm moist hide. Trial and error.....this worked for me and helped me raise some very smooth healthy Cherries. Again....just my way of doing things.
2efjqsi.jpg
What a beautifull Cherry! I just want to say that I loved the pics of your planted enclosures, indoor and out and learned so much from you! Thank you for all your ideas and for letting me learn from you about planting living habitat for my babies:)
 

Pearly

Well-Known Member
5 Year Member
Joined
Jul 14, 2015
Messages
5,279
Location (City and/or State)
Central Texas, Austin area
Made some adjustments based on the feedback. I moved the strip light to one side and the hide to the other side, under the CHE and facing away from the light. I now have two hides under the CHE. The side with the light is pretty bare now, I plan to put more plants there. A little garden for the torts and also, it'll block out more of the light from spreading to the darker side. As you all suggested, I'll have to see how the tort behaves before I'll know what other changes I'll need.

Thanks for all the help!

View attachment 186777 View attachment 186778
Where did you get this enclosure???!!! I looooove it!!!! Redfoot NERD brings up good point about the stones. I have some smooth flat river rocks too, some around water dish and some heavier ones to anchor my plants in. My babies are bigger now so the "stumbling" over them is no longer concern, but if you get tiny baby, look at the floor level to see what obstacles there may be. Where they could potentially topple over on their back due to attempts to climb or get wedged in some tight space. You don't want them to get stuck. I also planted my plants directly in substrate which worked great with little babies bcs they had those nice soft canopies to hide under rather than a big pot that they just have to walk around. If you want to keep yours in pots see if you can bury entire pot in substrate and make it all one level. Can put some flat rocks around for smooth transition in their walking surface. I think you'll end up with one of TFO showcase indoor enclosures. Love what you're doing!
 

a5fung

Member
5 Year Member
Joined
Aug 7, 2010
Messages
73
Where did you get this enclosure???

I got it from animal plastics (http://www.apcages.com/home/). It's really well made and easy to assemble. It's a great option since I have no DIY building skills.

Thanks for a the additional tips @Redfoot NERD, I'll keep working on it! I had two hides since I wanted to to get more than one tort, and was thinking I'll give them more options, especially if they want to sleep separately. The backside of the half log is covered by the wall and moss plant, so there's only one entrance. I'll be removing the rocks, perhaps move them to line the walls for now until they are bigger. I've read that rock can help them trim their claws. I'll also rotate the light and move the slate as suggested. I've ordered a pack of grazing seed mix which I plan to plant on the light side.

Thanks!
 

Pearly

Well-Known Member
5 Year Member
Joined
Jul 14, 2015
Messages
5,279
Location (City and/or State)
Central Texas, Austin area
I got it from animal plastics (http://www.apcages.com/home/). It's really well made and easy to assemble. It's a great option since I have no DIY building skills.

Thanks for a the additional tips @Redfoot NERD, I'll keep working on it! I had two hides since I wanted to to get more than one tort, and was thinking I'll give them more options, especially if they want to sleep separately. The backside of the half log is covered by the wall and moss plant, so there's only one entrance. I'll be removing the rocks, perhaps move them to line the walls for now until they are bigger. I've read that rock can help them trim their claws. I'll also rotate the light and move the slate as suggested. I've ordered a pack of grazing seed mix which I plan to plant on the light side.

Thanks!
Great! Good for your.
 

Redfoot NERD

Well-Known Member
10 Year Member!
Joined
Dec 5, 2007
Messages
3,662
Location (City and/or State)
Tennessee
trim their claws is nonsense... why would they need to trim their claws? - another example of the bizarre things found online.. by those that try to think.
Let your tort tell you what they need.. by their actions... then think about what they are trying to tell you.
 

a5fung

Member
5 Year Member
Joined
Aug 7, 2010
Messages
73
1473874625367.jpg 1473874643380.jpg 1473874684060.jpg 1473874694226.jpg 1473874711707.jpg Finally here! Gave a warm soak and some greens, then he went straight to the hide. I'll leave him/her alone for now .
 

terryo

Well-Known Member
10 Year Member!
Joined
Aug 24, 2007
Messages
8,974
Location (City and/or State)
Staten Island, New York
Beautiful!! Make's me want to get another baby. Was thinking ....you can also plant some spring mix. When mine were little, I got a Christmas Tree storage bin. It was really big, and I planted some Spring Mix. They loved it. Just a thought.


a5fung

Member
5 Year Member
Joined
Aug 7, 2010
Messages
73
Beautiful!! Make's me want to get another baby. Was thinking ....you can also plant some spring mix. When mine were little, I got a Christmas Tree storage bin. It was really big, and I planted some Spring Mix. They loved it. Just a thought.

186912[/ATTACH]]

Good advice. I planted some grazing mix seeds, hoping they'll spout in a week or so.

He ventured out for a bit, checking out his new crib.
1473895451711.jpg
 

terryo

Well-Known Member
10 Year Member!
Joined
Aug 24, 2007
Messages
8,974
Location (City and/or State)
Staten Island, New York
Love that picture. That substrate could be a little hard for him/her to get around on. Maybe you could mix some coco coir in there or put a layer on top. They are so sweet at this age. Look at that little face!
 

a5fung

Member
5 Year Member
Joined
Aug 7, 2010
Messages
73
It's hard to see but half the enclosure is coco coir and half reptibark. The part where his hides are is coco coir and moss. I'll see how he likes it and will adjust the ratio. Thanks!

Here's a top shot with better view of the substrate split. 1473898183248.jpg
 
Top